How to Photograph Your Hand for Palmistry: Angle, Light and Common Mistakes
A palmistry photo reading depends on your palm being clearly visible. No photography studio is needed, but a few specific steps matter. This guide covers angle, light, which hand to use and the most common mistakes.
Which hand to photograph for palmistry
In traditional palmistry the dominant hand is read for what you have developed and built in this life, and the non-dominant hand for the natural traits you were born with. For online readings the dominant hand is requested as the base, though you can send both if you want a more complete reading. If you are ambidextrous, choose the hand you write with most of the time.
Angle and position of the hand
The palm must be perfectly flat and fully open, with fingers stretched but not forced. Photograph from above, perpendicularly to the palm, not at an angle. Tilting the camera causes parts of the palm to fall into shadow and makes the minor lines harder to see. The camera should be about 20 to 25 centimeters from the hand so the lines are legible without the image going out of focus.
Light: what makes the difference in palmistry
Soft lateral light is the best option because it creates a slight relief in the palm lines and makes them more visible. Direct flash or flat overhead light removes that relief and flattens the lines, making the reading harder. Try natural lateral window light or a desk lamp to one side. Make sure there are no finger shadows falling across the palm.
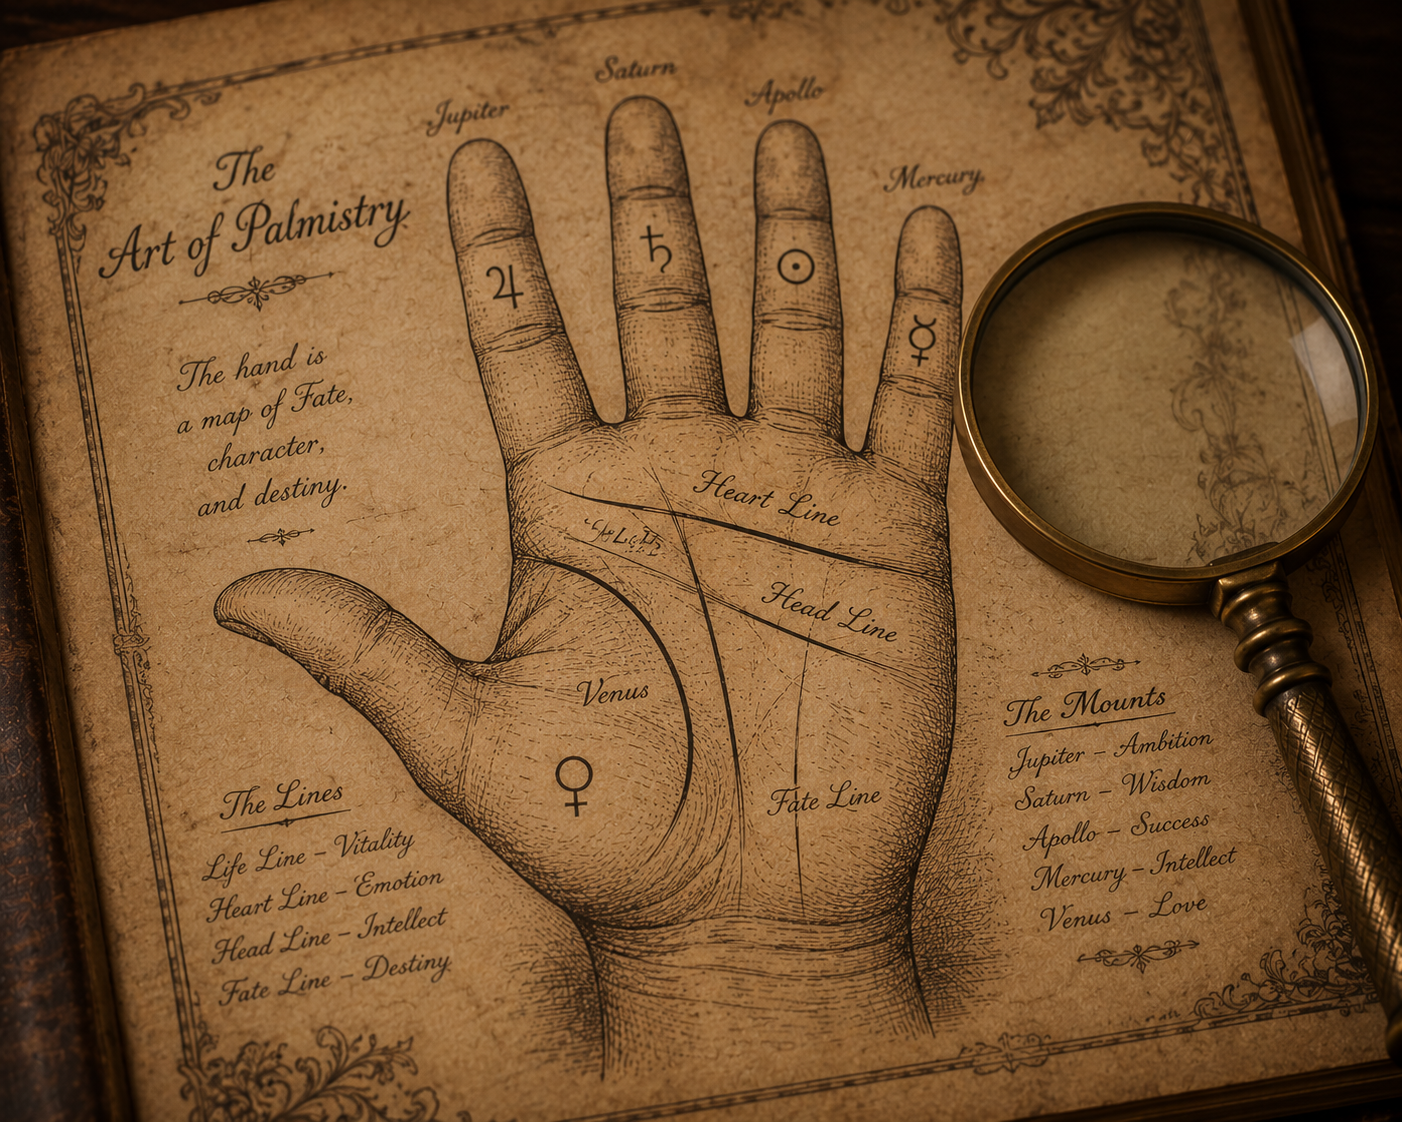
Your palm, analyzed in detail.
Upload your hand photo and receive analysis of the four main lines plus the mounts. Written reading.
Upload my hand photoMost common mistakes that ruin the palmistry photo
The most frequent mistakes are: tense hand with curved fingers, diagonal shot, flash that flattens the lines, image too dark or with shadows across it, and cropping that cuts off the wrist since the wrist lines are also read. Another common mistake is photographing the hand on a dark surface: a light background like white paper makes the palm outline clearly visible.
How many photos to send for the reading
For the basic reading one photo of the dominant palm is sufficient. If you want a comparison between hands, send one of each, always under the same light conditions. If the first photo did not turn out well, take several and choose the sharpest one before sending. It does not need to be perfect, only the main lines need to be clearly visible.
The invisible in your inbox.
Palmistry and hand reading guides. No spam.